Love in the Kitchen - making fast, healthy, homegrown meals you'll enjoy

Monday, June 16, 2014

Love from the Grill: The Perfect Steak


This is a special week here at Love in the Kitchen.  This week we put on our sunglasses, grab our barbeque tongs and head out to the back patio to bring you Love from The Grill!  We're featuring recipes meant just for the grill all this week, along with our best tips to help make you master the grill.

Today we're talking steak.  Grilling the perfect steak is actually quite simple if you know just a few things:
 - get the right cut of meat
 - trim excess fat
 - season it before grilling
 - make sure you've got enough heat
 - be patient when you take it off the grill


Get The Right Cut:


Ribeye
The ribeye usually has more fat than the other cuts. Because of that, it has the richest flavor of all the steaks. They tend to be “soft” as well as tender. They also have a great balance between tenderness and flavor.

They are available as a boneless steak or a bone-in steak.  The bone-in ribeye is referred to as a “Delmonico.”  It is exactly the same steak, but it still has the bone attached.  The Delmonico is one of my personal favorites, and is the one I've shown here.

Filet/Tenderloin
The filet is the most tender of all the steaks but it is also the least flavorful of all. If tenderness alone is your criteria, this is the one for you. Flavor is usually enhanced by such methods as wrapping with bacon, stuffing with bleu cheese or mushrooms, or topping with various sauces.

New York Strip
This is sometimes referred to as a “top loin,” “strip steak,” or, in New York, as a “sirloin.” It is actually a continuation of one of the muscles that makes up the ribeye. Unlike the ribeye, the New York is primarily a single muscle. While very tender, this steak has a firmer texture than the ribeye. Choosing between these two is really a toss-up. They are both good, tender, flavorful steaks.

Top Sirloin
This cut is the least tender, and has the most flavor. It is said to have gotten its name from Henry VIII, who pulled out his sword, tapped it, and dubbed it “Sir Loin.” And if you've seen images of Henry VIII, you can tell that he knew his food!

This can really be the “king” of steaks. With its inherent flavor, when you get one that is tender, it is unsurpassed. Even with proper beef, this can be tricky, but, if flavor is your criteria, this is the steak for you.

T-Bone and Porterhouse
These are cut, bone-in, from the loin section. The larger of the two muscles that you see is actually a “New York Strip.” The smaller muscle on the other side of the bone is the filet.

The whole filet, as it sits below the spine, is large at one end and tapers down to a flat point at the other. The first few steaks that come off of this section have the larger sized filets. These are called “porterhouse” steaks. The name comes from them being the most prized steaks offered in “ale houses” in the 1800s. By definition, the filet on the porterhouse must be at least 2-¼ inches across.

As you progress down the loin, the filet becomes smaller and smaller. These steaks are referred to as “T-bones” because of the shape of the bone. Very simply, these steaks are simply a bone-in combination of New York/filet.


Trim Excess Fat:

You know that fat gives a steak that great flavor.  But excess fat around the outside just melts on the grill and can cause flare-ups resulting in burnt steak.  Trim all but a thin layer of fat from the outside of your steaks just after taking them out of the refrigerator.

Get the Seasoning Right:

A good piece of meat only needs two things: salt and pepper.  Seriously.  Save the marinades for your London Broil or Tri-tips.  Liberally salt and pepper both sides of your steak before you put it on the grill.


Use High Heat to Sear in the Flavor:

If you’re using charcoal you’ll want very hot coals.  Use the 2 second rule to test them; you should be able to hold your hand a few inches over the grill for only about 2 seconds before it’s too hot.  Once they are hot, move them to one side of the grill so you can have both direct and indirect heat.  If you’re using a gas grill, crank that baby to high.   When the grill is preheated (on a gas grill let it heat for at least 10-15 minutes).  Place the steak on the grill and do not move.  Grill for 3 minutes per side over the high heat.  Use tongs to turn your steak, not a fork so that you keep the juices and the flavor in the steak where it belongs.  Then, check the internal temperature.  If your steak needs to cook longer, move it (with the tongs) to the indirect heat side of your grill.  Remove your steak when it is 5 degrees below the desired temperature - it will continue to cook once it is off the grill and you don't want it to overcook.


Rare:  120 - 125 degrees F. (50 - 55 degrees C.)
Medium-rare:  130 - 135 degrees F. (55 - 57 degrees C.)
Medium:  140 - 150 degrees F. (60 - 65 degrees C.)
Medium-well:  155 - 165 degrees F. (68 - 74 degrees C.)
Well:   170 or higher degrees F. (77 or higher degrees C.)


Be Patient:

Now you need to let your steak rest.  At least 5 minutes, preferably 10.  Cover it with foil.  Then toss the salad, slice the bread, pour the wine... This resting time lets juices that have been drawn to the surface to relax back into the meat. You will not regret this last step.


And that's it!  It seems like a lot, but it really comes down to this:

  • Get good steak
  • Season it
  • Sear it
  • Watch the temperature
  • Let it rest


If you follow these steps, you'll have a perfect steak, every time.


Check back all this week for more Love from the Grill!  And head over to Love in the Kitchen on Facebook for even more grill tips and recipes to help you be the master of the grill.

zentMRS - Love in the Kitchen
Pin It

Thursday, June 12, 2014

Baked Orange and Buttermilk Donuts with Orange Blossom Glaze


I have always loved donuts.  When I was young, I was a Winchell's girl.  Cruellers were my favorite, though a perfectly fried, plain cake donut always held a special place in my heart.

And while I still love donuts, I don't always want something fried.  These baked donuts are a fantastic replacement for my old favorites.  The bright flavor of orange in the donuts and delicate orange blossom flavor in the glaze are a perfect match for the light and fluffy donut.


They don't take long to make - about 30 minutes in all - so these are a great way to start a busy Saturday!


Baked Orange and Buttermilk Donuts with Orange Blossom Glaze

by Susan Zentmyer
Prep Time: 10 minutes
Cook Time: 20 minutes
Keywords: bake breakfast
Ingredients (18 donuts)
  • 2 cups cake flour
  • 3/4 cup granulated sugar
  • 2 teaspoons baking powder
  • 1/2 teaspoon orange zest
  • 1 teaspoon salt
  • 3/4 cup buttermilk
  • 2 eggs, lightly beaten
  • 1/4 cup orange juice
  • 2 tablespoons butter, melted
  • 2 cups confectioners' sugar
  • 3 to 4 tablespoons milk
  • 1-2 teaspoons orange blossom syrup
Instructions

  • Preheat oven to 425°F. Spray Doughnut Pan with vegetable cooking spray.
  • In large bowl, sift together flour, sugar, baking powder, orange zest and salt. Add buttermilk, eggs, orange juice and butter. Beat until just combined. Fill each pan cavity approximately 2/3 full.
  • Bake 7-9 minutes or until the tops of the doughnuts spring back when touched. Let cool in pan 1-2 minutes before removing.
  • While donuts are baking, make the glaze by stirring together the confectioners' sugar, 3 tablespoons milk and 1 teaspoon orange blossom syrup. Add more syrup to taste and more milk if necessary for a smooth medium-thin glaze.
  • Dip the top of each donut in the glaze and let set for a few minutes. Serve while still fresh and warm!
Powered by Recipage

zentMRS - Love in the Kitchen
Pin It

Tuesday, June 10, 2014

Fresh Lemonade with Watermelon Ice


Is there anything more refreshing on a hot summer day than a tall glass of sweet, delicious lemonade?  THis classic recipe is easy to make (you can even skip the step that requires heating the sugar if you are short on time - simply stir the sugar into the water until it dissolves).


Using frozen watermelon instead of ice cubes keeps the lemonade from getting watered down.  And you get the added benefit of eating the watermelon when you are done... infused with lemon-y goodness!

We've got a dwarf Meyer lemon tree.  Meyer lemons are naturally a bit sweeter and have a strong, almost herbal fragrance.  We use those when making our lemonade, but any fresh lemons will be fine.


Fresh Lemonade with Watermelon Ice

by Susan Zentmyer
Prep Time: 10 minutes, plus 2 hours for freezing
Ingredients
  • 2 cups white sugar
  • 8 cups water
  • 2 cups lemon juice
  • 2 cups watermelon cubes
Instructions
  • Put the watermelon into gallon-sized plastic freezer bags so that the watermelon is in a single layer. Lay the bags flat in the freezer, and freeze until frozen through, about 2 - 4 hours.
  • In a small saucepan, combine sugar and 1 cup water. Bring to boil and stir to dissolve sugar. Allow to cool to room temperature, then cover and refrigerate until chilled.
  • In pitcher, stir together chilled syrup, lemon juice and remaining 7 cups water.
  • Serve in tall glasses, with several frozen watermelon cubes.
Powered by Recipage


zentMRS - Love in the Kitchen
Pin It

Monday, June 09, 2014

Tuesday's Table for June 10, 2014

I'm enjoying the beginning of summer so far.  My garden is growing and we've been grilling ust about every day!  With Father's Day this weekend, I'm looking for the perfect dinner for the grill.  Have you got any ideas to share?


This week's feature is Makin' it Mo Betta's Bobby's Pimento Cheese!  I've been kind of obsessing ofver pimento cheese for some reason lately, and I think this will be the recipe I use to make my very first batch!   You need to head over and see their site.


Please grab a button  - and thanks so much for sharing!

And now it's time to fill Tuesday's Table.  What kinds of delicious and creative things have been coming out of your kitchen lately?  I can't wait to see them!

For this week's party, only a few guidelines:
  • Please share as many links as you like, but only if you haven't shared them here before
  • Add a link back to Tuesday's Table (or grab a button above!) so others can join in the fun
  • Follow me via Facebook, Pinterest, Twitter, Google+, RSS or Bloglovin (see my sidebar!)
No other requirements, but visit the other links here, and I'd love for you to sign up for my email reminder here!

And now, for this week's link party!


zentMRS - Love in the Kitchen
Pin It

Thursday, June 05, 2014

Slow Cooker Chicken Parmesan


I love my slow cooker.  Being able to fill it with ingredients in the morning before work and then coming home to a finished meal after work keeps me sane!

I don't always love the way the meals look when they come out of the slow cooker though.  Delicious yes, but beautiful?  Not always.

And a little crunchy texture?  Forget about it.


I set out to find a way to have my slow cooker ease AND a beautiful dish.  This chicken parmesan was a perfect choice.


Chicken done in the slow cooker often comes out falling apart - because we often cook it too long.  I cooked this only until it was done, just a little over 3 hours.

I also started with a thick, almost paste-like sauce because chicken gives off a lot of moisture when it cooks and makes the sauce soupy.

Then, at the end, I added the cheese, which melted while I make a crispy herbed bread crumb topping.


This was a fantastic meal.  The best compliment of the evening:  when I served this to my mother-in-law, she said "I thought you said you made dinner in the crock pot"  Recipe WIN!


Slow Cooker Chicken Parmesan

by Susan Zentmyer
Prep Time: 15 minutes
Cook Time: 3 - 4 hours
Ingredients
  • 6 (6- to 8-ounce) boneless, skinless chicken breasts, trimmed
  • Salt and pepper
  • 5 teaspoons olive oil
  • 1 onion, chopped
  • 1 (6-ounce) can tomato paste
  • 4 garlic cloves, minced
  • 1 teaspoon dried oregano
  • 1 teaspoon dried basil
  • 1 teaspoon red pepper flakes
  • 1 (28-ounce) can diced tomatoes, drained
  • 1 tablespoon cornstarch
  • 1 tablespoon water
  • 8 ounces fresh mozzarella cheese, sliced
  • 1/4 cup grated Parmesan cheese
  • 4 tablespoons chopped fresh basil
  • 1/3 cup panko bread crumbs
Instructions
1. Season chicken with salt and pepper. Heat 1 tablespoon oil in 12-inch nonstick skillet over medium-high heat until shimmering. Add onion, tomato paste, garlic, dried basil, dried oregano, pepper flakes, 1/4 teaspoon salt, and 1/4 teaspoon pepper and cook until onions are softened and tomato paste is rust-colored, about 4 minutes.
2. Transfer tomato paste mixture to slow cooker and stir in tomatoes. Dissolve cornstarch in water and stir into tomato mixture. Shingle breasts on top of tomato mixture with tapered ends pointing toward control panel. Cover and cook until chicken registers 160 degrees, 3 to 4 hours on low.
3. Combine mozzarella and 2 tablespoons Parmesan in bowl. Sprinkle chicken with 2 tablespoons fresh basil, followed by mozzarella mixture. Cover and let sit in turned-off cooker until cheese is melted, about 15 minutes.
4. Meanwhile, combine panko and remaining 2 teaspoons oil in 12-inch nonstick skillet over medium heat and cook, stirring often, until well browned, 3 to 5 minutes. Transfer panko to bowl, let cool for 5 minutes, then stir in remaining 2 tablespoons Parmesan, remaining 2 tablespoons fresh basil, 1/2 teaspoon salt, and 1/2 teaspoon pepper. Sprinkle panko mixture over cheese. Serve.
Powered by Recipage


zentMRS - Love in the Kitchen
Pin It

Monday, June 02, 2014

Tuesday's Table for June 3, 2014

We had a lovely Memorial Day - I hope y'all did too.  And now summer has officially begun!  Time for fresh fruit, garden vegetables and grilling.  Have you got any ideas to share?


This week's feature is Living the Gourmet's Pear Tart!  This looks so moist and sweet and comforting.  I am putting pears on my farmer's market list this week!   You need to head over and see their site.


Please grab a button  - and thanks so much for sharing!

And now it's time to fill Tuesday's Table.  What kinds of delicious and creative things have been coming out of your kitchen lately?  I can't wait to see them!

For this week's party, only a few guidelines:
  • Please share as many links as you like, but only if you haven't shared them here before
  • Add a link back to Tuesday's Table (or grab a button above!) so others can join in the fun
  • Follow me via Facebook, Pinterest, Twitter, Google+, RSS or Bloglovin (see my sidebar!)
No other requirements, but visit the other links here, and I'd love for you to sign up for my email reminder here!

And now, for this week's link party!


zentMRS - Love in the Kitchen
Pin It

Monday, May 26, 2014

Tuesday's Table for May 27, 2014

We had a lovely Memorial Day - I hope y'all did too.  And now summer has officially begun!  Time for fresh fruit, garden vegetables and grilling.  Have you got any ideas to share?


This week's feature is Such a Mama's Banana Bread Cupcakes!  I have a great banana bread recipe that I love to bake.  But I've never thought about making it into a cupcake recipe.  I think these cupcakes look amazing and can't wait to try them!   You need to head over and see her site.


Please grab a button  - and thanks so much for sharing!

And now it's time to fill Tuesday's Table.  What kinds of delicious and creative things have been coming out of your kitchen lately?  I can't wait to see them!

For this week's party, only a few guidelines:
  • Please share as many links as you like, but only if you haven't shared them here before
  • Add a link back to Tuesday's Table (or grab a button above!) so others can join in the fun
  • Follow me via Facebook, Pinterest, Twitter, Google+, RSS or Bloglovin (see my sidebar!)
No other requirements, but visit the other links here, and I'd love for you to sign up for my email reminder here!

And now, for this week's link party!


zentMRS - Love in the Kitchen
Pin It

Remembering


zentMRS - Love in the Kitchen
Pin It

Friday, May 23, 2014

Memorial Day Menu Ideas


Maybe you having a get-together for Memorial Day, and your menu is set, groceries purchased, drinks already on ice.  I wish that were me this year.  This year though, I've barely thought about it.

If you're like me this year, I've got a few ideas to get your started:

  • California Burrito Burger:  The California Burrito is a San Diego creation that takes a traditional carne asada burrito and adds fries.  Sounds strange, tastes fantastic.  I love burgers and thought it would be great to make a tasty burrito into a fabulous burger - and thus the California Burrito Burger is born!
  • Fresh Corn Salad: This was so good, I could have it every night!  I love this perfect combination of sweet and salty and spicy.   
  • Patriotic Snow Cone Cupcakes:  These were delicious!  I absolutely loved the cake, and they looked fantastic.  Definitely worth the effort if you are having a Memorial Day party.  Or even if you just like pretty and great-tasting cake!
  • Red, White and Blue Sangria:  Traditonally, sangria is made with fruit (citrus and apple), brandy and red wine.  This {patriotic} favorite of mine uses raspberries {red}, blueberries {blue}, rum and sparkling {white} wine for a refreshing alternative.
  • Strawberry Popsicles:  This time of year, we've got lots of wonderful fresh produce that needs to be used, and seem to always be in need of frosty treats.  These strawberry treats are the answer to both -  plus, they are easy to make and healthy!
  • Spicy Corn and Pepper Casserole:  This is a fantastic dish.  I love corn (could eat it every single day) and I love peppers (ditto).  And this casserole brings those flavors together in a wonderful, creamy, spicy combination that is out of this world.  Give it a whirl! 
  • Red, White and Blueschetta:  A slightly different version of the traditional Italian classic.  Perfect for a patriotic party, and delicious anytime.
  • Mini-Drumsticks:  One of my favorite treats comes from the freezer - Drumsticks!  They have everything - chocolate, ice cream, nuts and cookie-cone.  Delicious! 
  • Spicy Smokehouse BBQ Ribs:  Nothing says summer like dinner from the grill!


What's on your Memorial Day menu?  Or are you still thinking?


zentMRS - Love in the Kitchen
Pin It

Thursday, May 22, 2014

Fresh Pea Soup


Peas have always been one of my favorite vegetables.  Maybe because my mom never served them from a can when I was a kid, and they were always sweet, buttery and crisp.

Vibrant green, this soup is the very essence of the flavor of spring peas.  I use frozen peas because they are always frozen at the peak of their sweetness.  If you use fresh peas, be sure to use them as soon as possible after picking to preserve the sweet, fresh pea flavor.


Fresh Pea Soup

by Susan @ Love in the Kitchen
Prep Time: 5 minutes
Cook Time: 10 minutes
Ingredients (Serves 4 - 6)
  • 2 tablespoons butter
  • 1 medium onion, chopped
  • 4 cups chicken broth
  • 4 cups fresh or frozen green peas
  • Salt and pepper to taste
Instructions

  • Saute the onion in the butter in large and heavy pot.
  • Add broth and bring to a boil. Add peas, return to a boil.
  • Remove from the heat and puree the soup using an immersion blender (or blend in a food processor or blender in batches).
  • Season to taste with salt and pepper. Ladle into bowls and serve with a sprinkling of parmesan cheese and a slice of crusty French bread.
Powered by Recipage


This is a fantastic starter for dinner, or for a light lunch.  It can be served hot or cold.  {white wine may be optional, depending on the day}


zentMRS - Love in the Kitchen
Pin It

Monday, May 19, 2014

Tuesday's Table for May 20, 2014

With schools everywhere finishing the year and Memorial Day right around the corner, it is definitely time to switch into summer mode.  Time for fresh fruit, garden vegetables and grilling.  Have you got any ideas to share?


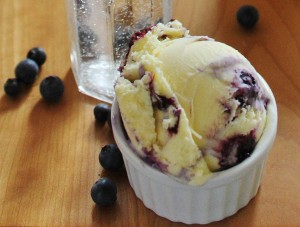
This week's feature is One Acre Farm's Hucklebery Swirl Lemon Ice Cream!  Homemade ice cream is one of the best parts of summer.  We had lots of ice cream in the summer when I was a kid, and lots of huckleberries too, but we never had them together!  This recipe is at the top of my list of things to make.  And soon!   You need to head over and see her site.


Please grab a button  - and thanks so much for sharing!

And now it's time to fill Tuesday's Table.  What kinds of delicious and creative things have been coming out of your kitchen lately?  I can't wait to see them!

For this week's party, only a few guidelines:
  • Please share as many links as you like, but only if you haven't shared them here before
  • Add a link back to Tuesday's Table (or grab a button above!) so others can join in the fun
  • Follow me via Facebook, Pinterest, Twitter, Google+, RSS or Bloglovin (see my sidebar!)
No other requirements, but visit the other links here, and I'd love for you to sign up for my email reminder here!

And now, for this week's link party!


zentMRS - Love in the Kitchen
Pin It

Grilled Rosemary Chicken Skewers


I know I've mentioned that I love grilling, especially in the summer.  Chicken on the grill is wonderful for busy weeknights because it cooks so quickly.


I also love rosemary.  I planted a small plant in our yard years ago, and we have a massive bush now.  I use it in all kinds of things, from savory dishes and breads to jelly and even cookies!

Using fresh rosemary sprigs as skewers serves two purposes:  it infuses the meat with just the right amount of rosemary flavor (too much can get overwhelming, especially with the delicate flavor of chicken breast) and provides a skewer that doesn't burn immediately - no soaking required!.


This recipe goes together in a snap, and tastes great with a fresh salad and some crusty French bread.

{If you are looking to save some time, replace the vinaigrette ingredients with bottled red wine vinaigrette and use chicken tenders to save the time spent cutting the chicken!}


Rosemary Chicken Skewers

by Susan Zentmyer
Prep Time: 20 minutes
Cook Time: 8 minutes
Ingredients
  • 1/4 cup olive oil
  • 1 teaspoon garlic powder
  • 1 teaspoon dried oregano
  • 1 teaspoon dried basil
  • 1 teaspoon pepper
  • 1/2 teaspoon salt
  • 1 teaspoon onion powder
  • 1/3 cup red wine vinegar
  • 1/4 cup lemon juice
  • 10 long sturdy rosemary sprigs
  • 1 lb boneless skinless chicken breast, cut into 1-inch cubes
Instructions
Mix together the oil, garlic powder, oregano, basil, pepper, salt, and onion powder. Pour in the vinegar and lemon juice, and mix vigorously until well blended.

Marinate the chicken pieces in the vinaigrette for at least 15 minutes and up to 3 hours.

Leaving a bushy "top," strip the rest of the needle-shaped leaves from each rosemary sprig to make a "skewer." Thread the chicken cubes on the skewers, placing a roasted garlic clove between each two cubes. Season the skewers with pepper to taste.

Preheat the grill until very hot (if using a charcoal grill, places charcoal briquettes on one side only). Add the chicken skewers and lower heat to medium (for charcoal grill, place the skewers on the side without the briquettes).

Grill for 4 minutes on each side, until the chicken is firm. Sprinkle with additional salt and pepper. Serve immediately.
Powered by Recipage


zentMRS - Love in the Kitchen
Pin It