Love in the Kitchen - making fast, healthy, homegrown meals you'll enjoy

Wednesday, July 31, 2013

A Surf and Turf Dessert

Looking for a simple and utterly cute dessert?  This totally fits the bill.


Oh, and these too.


I'm guest posting over at Addicted to Recipes today - click over there to find out how easy it is to get these cuties on the table!


zentMRS - Love in the Kitchen


Pin It

Monday, July 29, 2013

Tuesday's Table for July 30, 2013 - And a *Giveaway*!!


Time to fill Tuesday's Table!

Thanks to everyone who linked up last week - we had a fantastic week!  I chose Dizzy Busy and Hungry's Peanut Butter S'more Pastries as my feature. Oh my, do these look tasty!  The best of S'mores... with peanut butter and no mess.  Yum!  You need to head over and see this recipe.!


Please grab a button  - and thanks so much for sharing!


We also had a giveaway last week.  Picked randomly, the winner is <drumroll>

#25- Chaya at Bizzy Bakes!</drumroll>  Please send me your mailing address and I'll get that out to you right away.


Here's what I'll be giving away this week:

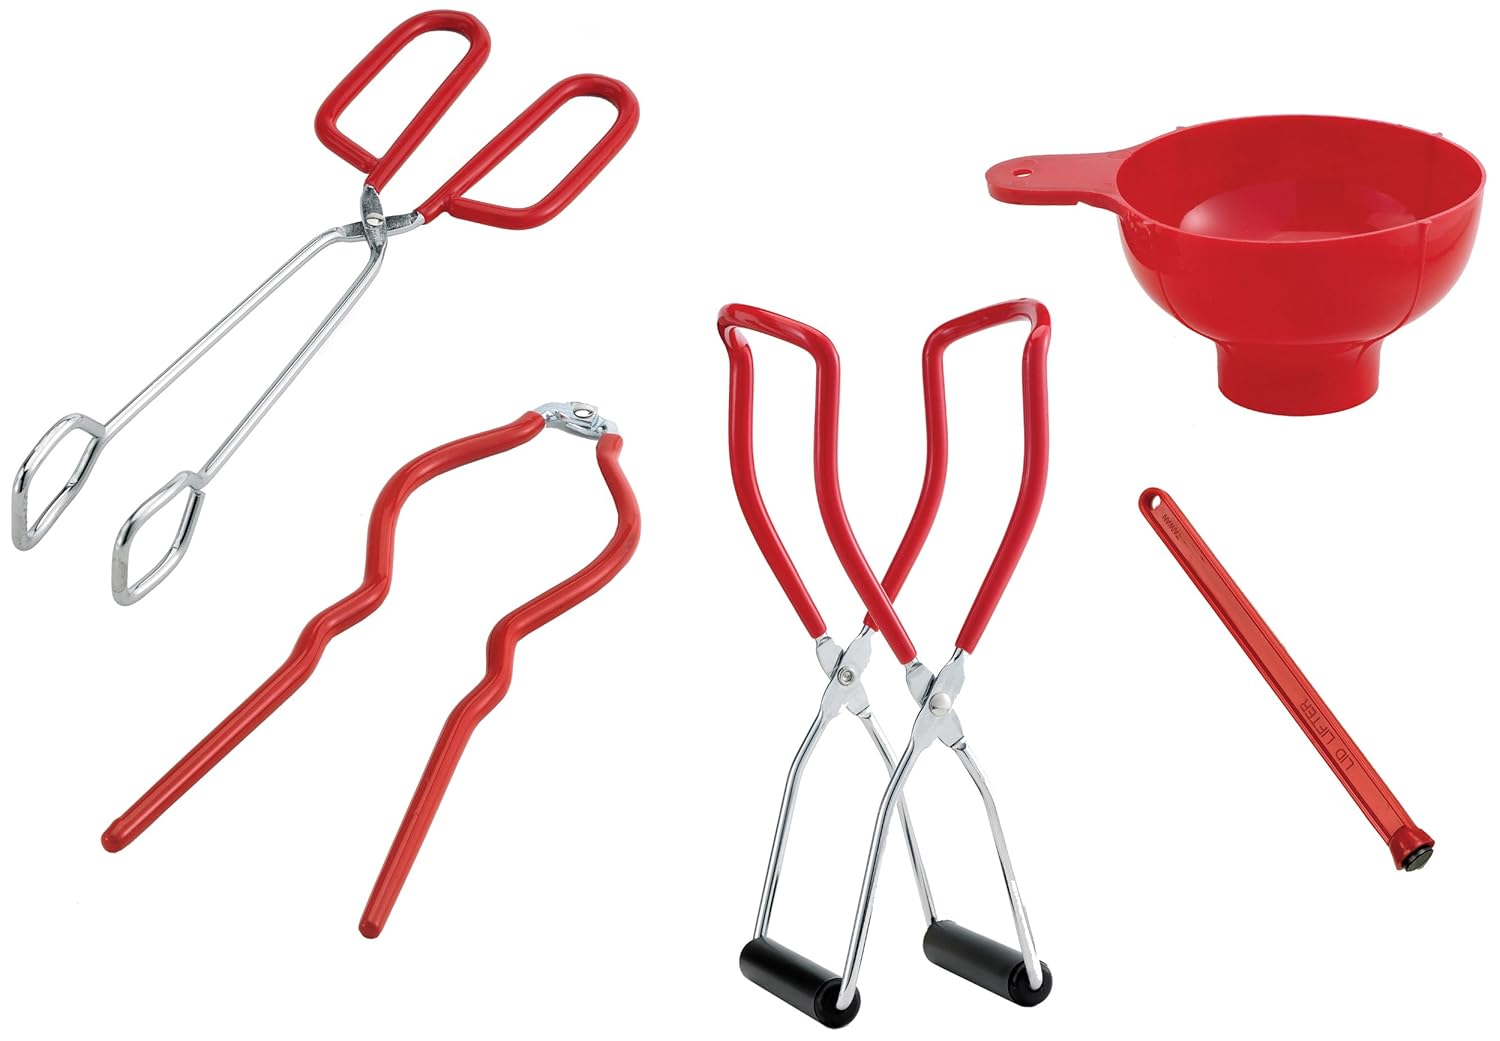
5-Piece Canning Set


To enter, link up your recipes, crafts and ideas. And for each link you add, you will get one entry. And if you send over a friend who follows me and adds a comment telling me who sent them, you get an extra entry!

Only a few guidelines:
  • Please share as many links as you like, but only if you haven't shared them here before.  
  • Add a link back to Tuesday's Table (or grab a button above!) so others can join in the fun.  
  • Follow me via Google+ or Bloglovin.
No other requirements, but visit the other links here, and I'd love for you to sign up for my email reminder here!

And now, for this week's link party!


zentMRS - Love in the Kitchen
Pin It

Friday, July 26, 2013

Homemade Drumsticks: Ice Cream Cones, Magic Shell and Sprinkles!


Growing up, one of my favorite treats came from the freezer - Drumsticks Sundae Ice Cream Cones.  They had everything - chocolate, ice cream, nuts and cookie-cone.  Delicious!

I've been making lots of ice cream lately, so when it {finally} occurred to me to wonder whether I could make Drumsticks at home, I immediately said "how hard could it be?"

And it turns out, really not that hard at all!  Simply put, you will need:


  • Ice Cream
  • Cones
  • Magic Shell
  • Toppings

While you could buy all of these components, they are really quite easy to make, and the homemade versions taste so much better.  Here's how:

For the Ice Cream:

  • 2 cups half-and-half cream (fat-free works well)
  • 1/4 cup heavy cream
  • 1/2 cup white sugar
  • 1 teaspoon vanilla extract
  • 1/4 teaspoon salt
Combine half-and-half, cream, sugar, vanilla and salt in a bowl.  Stir until the sugar is mostly incorporated.  Add to the freezer container of your ice cream maker and freeze according to manufacturer's instructions.


I made the cones while the ice cream was freezing.


For the Cones:

  • 2 large egg whites
  • 1/2 cup sugar
  • 1/2 teaspoon vanilla extract
  • 1/8 teaspoon salt
  • 2/3 cup flour
  • 2 tablespoons melted butter

 In a small bowl stir together the egg whites, sugar and vanilla. Add the salt and half the flour, stir, then stir in the melted butter. Beat in the remaining flour until the batter is combined.


Preheat the pizzelle iron (you can also use a panini press).   Add one spoonful of batter to each of two spaces - see below.  {I made them two at a time as they need to be formed quite quickly or they won't curve into a cone.}


When they are a nice golden-brown, form around a cone shape.  It doesn't matter what the cone is, just that it is the right shape - cover it with aluminum foil and spray with cooking oil before shaping your cones.


You will need to work quickly here as these cool and harden very quickly.


Once formed, set each cone aside to cool completely.  Continue with the remaining batter.


For the Magic Shell:


  • 1 cup milk or dark chocolate chips
  • 2 tablespoons coconut oil


Add chocolate chips and coconut oil to a microwave-safe bowl. Stir together and then microwave in 30-second increments until the chocolate chips have completely softened. Remove from microwave and stir together until smooth.


Assembling the Drumsticks:

Spoon a few tablespoons of magic shell into your cone, and spread through out to coat the inside of the cone.


If your cones have a small hole at the bottom (a number of mine did!) add a bit more magic shell to make sure that it is sealed.  You can also dip the bottom of the cone in the magic shell.  Set the cones on a baking sheet and put in the freezer to harden for 5 - 10 minutes.


Once the magic shell has set, fill the cones with ice cream.  {I put mine in the freezer for 20 minutes after filling because my ice cream was reasonably soft.}


Dip the tops of the cones in the magic shell...


... and quickly dip into the topping.  I used both rainbow sprinkles {a favorite with the kids who ate them} and a mixture of nuts and Heath Bar Crunch piece {my personal favorite}.  Place back into the freezer until ready to serve.


These were really delicious.  And super-fun!


I used vanilla ice cream and chocolate magic shell, but you could go in any direction with either of those - and with the toppings.  With so many flavor possibilities, which would you like to try first?  Something exotic?  Or an old favorite?


zentMRS - Love in the Kitchen
Pin It

Thursday, July 25, 2013

Ice Cream Roundup to Celebrate National Ice Cream Month

Did you know it is National Ice Cream Month?  To celebrate, I've pulled 3 ice cream recipe, 2 frozen yogurt recipes, 6 sorbet recipes and 3 Popsicle recipes from my archives!


Surely one of these would be perfect for celebrating National Ice Cream Month!

And since we can celebrate all month, I have a special treat to share with you tomorrow!  You've to to stop by to see it - see you then!


zentMRS - Love in the Kitchen
Pin It

Wednesday, July 24, 2013

Perfect Grilled Chicken - Every Time


We are at the height of grilling season right now - I love being able to come home from work and throw something on the grill.  Dinner on the table in under 40 minutes!

Boneless, skinless chicken breasts are great for the grill - quick to cook, and healthy too.  Chances are you have some in your freezer right now.  And if you pay attention to just three things, you can avoid dry rubbery chicken breasts and grill them perfectly every time.

  1. Moisture {make sure you have enough}
  2. Heat {not too hot}
  3. Time {not too long}


Seems pretty simple right?  Let's break it down.

First let's make sure we'll have juicy chicken breasts.  Brining is an important step in avoiding rubbery, dry chicken. Soaking the chicken in a salty brine reshapes the proteins in the meat in such a way that they retain moisture better when cooking.  And retaining moisture is key, as it provides some assurance that the meat will remain juicy even if a tad overdone, and be even better if cooked correctly.

Making a brine is simple - salt and water at its most basic.  Here I've added some other flavors (lime and red chiles):


Lime Chile Brine

Ingredients:

  • 1 quart cold water
  • 1/4 cup salt
  • 3/4 cup Rose's Lime Juice
  • 1/4 cup dried red chiles
  • 4 large (8-oz) boneless-skinless chicken breasts, pounded to even thicknesses


Directions:

Add the water, salt, lime juice and chiles to a 4-qt container. Whisk until the salt is completely dissolved. Add the chicken breasts, and let brine for 30 minutes.


Now it's time to grill!  You don't want to go too hot here, since the 500+°F of a new fire can too quickly dry out the breasts. On the opposite end, you don't want to go too low either because then there will no browning and you'll end with pale, unappetizing chicken. A medium-high fire, 375-450°F, is just about perfect, creating a golden crust without overdoing the meat.  {a grill thermometer like this one is really helpful}

In my experience, it only takes chicken breasts a few minutes per side over direct medium-high heat to both brown and be cooked through at the same time. That being said, it's a good idea to always have a two-zone fire—with all the coals piled on one side of the charcoal grate (or for a gas grill, turn off one half of the burners) — in case the chicken browns before it's done cooking through. This way you can finish the chicken up on the cool side of the grill, covered, and avoid burning the the breasts if need be.

Instant the thermometer in the middle of the breast—you know the chicken is done when it hits about 160°F. Let the chicken rest off the grill and the meat temperature will continue to rise to 165°F as approved by the FDA.


Now we have beautifully moist and evenly cooked chicken breasts!  You can add any sauce or side dishes you like to these - they will be delicious.  And you can say "Never again!" to rubbery chicken breasts!


zentMRS - Love in the Kitchen
Pin It

Tuesday, July 23, 2013

Pistachio Pudding Icebox Cake

Do you need a quick dessert - and a dessert that doesn't require the oven?  This old-fashioned recipe is the perfect answer!

I came across this recipe a few weeks ago.  My grandma used to make a similar dessert, and it was heavenly on a hot summer evening.  I made it with pistachio pudding (and exactly why, do you think, they make pistachio pudding that vibrant green color?  I'm pretty sure pistachios aren't quite so bright!) but you can make it with whatever pudding you have on hand.


Pistachio Pudding Icebox Cake

Ingredients:

  • 1 package pistachio pudding
  • 1 cup milk
  • 2 cups miniature marshmallows
  • 2 cups graham cracker crumbs (or whole graham crackers)
  • 2 cups whipped cream


Directions:

Prepare the pudding according the instructions on the box.  Layer the bottom of a loaf pan with graham crackers - you can either use crumbs or whole crackers.  If you use whole crackers, use pieces to cover the empty spots.


Cover the graham crackers with 1/2 of the pudding.


Add 1 cup of miniature marshmallows.


Cover with a layer of graham cracker (either crumbs or whole crackers as above), and cover with the remaining pudding.


Add 1 cup of miniature marshmallows and smooth into the pudding layer.


Cover with whipped cream and refrigerate.  This is best when it sets for a day, but can really be eaten at any time.


Easy and cool and creamy, this takes me right back to my Grandma's kitchen.


Try this one with different flavors of pudding - or use chocolate graham crackers.  Your imagination is the only limit to the flavor combinations for this recipe.


zentMRS - Love in the Kitchen
Pin It