Love in the Kitchen - making fast, healthy, homegrown meals you'll enjoy

Sunday, January 13, 2013

Beef Stew


I loved Dinty Moore Beef Stew when I was a kid.  A whole meal in a can, and great comfort food for a cold day.

Well it's cold here in San Diego this week.  Cold like we have to cover the plants to protect them from freezing cold.  This seems like the right time for some Dinty Moore Beef Stew.  Except that, since I am no longer a kid, I check the nutritional label and find that it's got a lot of calories, saturated fat and sodium.  Things that my no-longer-a-kid body cares about.

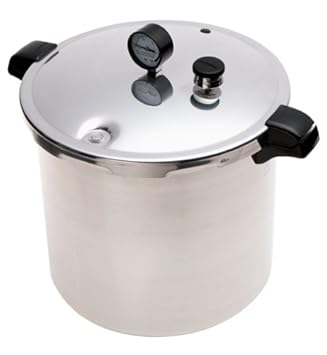
Good news, I can make beef stew myself - and put all of the things that I like in it!  And I can use my pressure canner to preserve lots of jars of it for more days when I want the convenience of a quick meal, but the wholesome goodness of a homemade meal.

Note:  If you don't want to can it, this recipe can be cut in half for a more manageable sized meal.  Just cook the stew and additional 30 - 45 minutes, or until it has thickened and the potatoes and carrots are soft.


Beef Stew

Ingredients:


  • 4 to 5 lb beef stew meat, cut into 1 1/2-inch cubes
  • 1 Tbsp vegetable oil
  • 12 cups cubed and peeled potatoes (about 12 medium)
  • 8 cups sliced carrots (about 16 small)
  • 3 cups chopped onion (about 4 small)
  • 1 cup diced tomatoes
  • 1-1/2 Tbsp salt
  • 1 tsp thyme
  • 1-1/2 Tbsp pepper
  • Water
  • 7 (32 oz) quart or 14 (16 oz) pint glass preserving jars with lids and bands


Directions:

1.  Prepare a pressure canner. Heat jars and lids in simmering water until ready for use. Do not boil. Set bands aside.
2.  Brown the meat in oil in a large saucepot. Add vegetables and seasonings to browned meat. Cover with boiling water. Bring stew to a boil. Remove from heat.


3.  Ladle the hot stew into hot jars leaving 1 inch headspace. Remove air bubbles. Wipe rim. Center hot lid on jar. Apply band and adjust until fit is fingertip tight.

4.  Process filled jars in a pressure canner at 10 pounds pressure 1 hour and 15 minutes for pints and 1 hour and 30 minutes for quarts, adjusting for altitude. Remove jars and cool. Check lids for seal after 24 hours. Lid should not flex up and down when center is pressed.


This was really good.  I added a can of corn to a quart of this and served it with crusty Italian bread.  Wonderful meal that brought back memories of being a kid (and my no-longer-a-kid body didn't have to pay the price)!



Zentmrs
Pin It

Saturday, January 12, 2013

Chicken Soup for the Pressure Canner


We got a pressure canner for Christmas.  I've been wanting one since I first started canning and added one to my Amazon Wish List when I was thinking how great it would be if I could can some of my French Onion soup so we could have some any time.

I have a pressure cooker (and I love it) but it doesn't have a pressure regulator, and it isn't quite big enough to can more than a couple of jars at a time.  So I was really excited about our Christmas present!   The first thing we made?  Chicken Soup!  Because there is nothing that warms up a cold winter day as well as a steaming bowl of chicken noodle soup.  Here's how we did it:


Chicken Soup for the Pressure Cooker


Ingredients:

  • 16 cups chicken stock
  • 3 cups diced chicken (about 1 3-lb chicken)
  • 2-1/2 cups sliced carrots (about 4 medium)
  • 1-1/2 cups diced onion (about 2 medium)
  • Salt, optional
  • Pepper, optional
  • 4 (32 oz) quart or 8 (16 oz) pint glass preserving jars with lids and bands


Directions:

  1. Prepare pressure canner. Heat jars and lids in simmering water until ready for use. Do not boil. Set bands aside.
  2. Combine chicken stock, chicken, celery, carrots and onion in a large saucepot. Bring mixture to a boil. Reduce heat and simmer 30 minutes. Season to taste with salt and pepper, if desired. Add bouillon cubes, if desired. Cook until bouillon cubes are dissolved.
  3. LADLE hot soup into hot jars leaving 1 inch headspace. Remove air bubbles. Wipe rim. Center hot lid on jar. Apply band and adjust until fit is fingertip tight.
  4. PROCESS filled jars in a pressure canner at 10 pounds pressure 1 hour and 15 minutes for pints and 1 hour and 30 minutes for quarts, adjusting for altitude. Remove jars and cool. Check lids for seal after 24 hours. Lid should not flex up and down when center is pressed.


Serve this with pasta or rice (add cooked pasta or rice when heating) or additional vegetables.


We had what didn't fit in the jars for dinner last night.  Delicious!  I used homemade chicken broth for this, which I think makes all the difference.

This was actually quite easy to make.  It took quite a long time to cook as I didn't have a good gauge on how long it would take to get up to 10 pounds of pressure.  Or how long it would take to reduce the pressure such that I could remove the jars from the canner.  I think it's worth it though - I've got jars of tasty chicken soup on my shelf for a rainy day!

Have you ever used a pressure canner or a pressure cooker?


Zentmrs
Pin It

Friday, January 11, 2013

Cinnamon Angel Cookies


I don't think it is any secret that I love cookies.  My mom always had cookies for dessert.  And three was the correct number of cookies to have for dessert.  To this day, I don't feel like dinner is complete without a cookie.

I wanted cookies last night, but didn't necessarily want to go to all the trouble of baking them from scratch.  I had a box of angel food cake mix and decided to try to make cinnamon cookies with it.  Here's what I did:


Cinnamon Angel Cookies

Ingredients:

  • 1 box angel food cake mix
  • 1/2 cup water
  • 3 teaspoons cinnamon
  • 1/2 cup butter, softened
  • 1/2 cup flour


Directions:

1.  Preheat oven to 375degress F.
2.  Combine cake mix and water.
3.  Drop cookies by rounded teaspoonful onto silpat covered baking sheet.
4.  Bake 8 to 10 minutes or until cookies are set and the edges golden. Remove from oven; cool completely.


These are delicious!  They taste wondefully cinnamon-y and a bit like a snickerdoodle.  And they came together in a flash.  So worth a try!


Zentmrs
Pin It

Thursday, January 10, 2013

Blueberry Pie Filling for Canning

When I was growing up, we had dinner at my grandparents' house on Sundays.  Grandma was a wonderful cook, though she would never admit it.  She made the best pot roast and absolutely divine fried chicken.  And one day I'll get the cast iron skillet she used to make those wonderful meals.  (unfortunately, it doesn't come with her recipes, her skill or her experience....)

After dinner, Grandpa would invariably ask "Would anyone like some blueberry pie?" to which we would always answer "Yes!" and he would respond "Guess you'd better go make some!"  I do love a good blueberry pie even now.

For some reason, blueberries were a screaming deal at all of the local grocery stores this week.  I couldn't pass that up, and I decided that I would can some blueberry pie filling so that we can have fresh blueberry pie at the drop of a hat.


Blueberry Pie Filling for Canning

Ingredients:

  • 12 c. blueberries, washed and dried
  • 2/3 c. water
  • 2 c. sugar
  • 6 T. quick tapioca
  • 6 T. bottled lemon juice


Directions:

1. Wash and dry the blueberries and set aside. Sterilize 3 quart jars along with the lids in boiling water or in a dishwasher run without soap.

2. In a large stockpot bring the water, sugar, tapioca and lemon juice and to a boil.

3. Pour in the blueberries very carefully and bring the mixture back to a boil, stirring continuously with a long spoon. Keep stirring for about 5 minutes while the berries release their juices and the mixture thickens, becoming blue and glossy.

4. Set a funnel over a quart jar and ladle in the blueberry mixture, leaving about 1″ of room at the top. Repeat with second quart jar.

5. Placed the sterilized lids on the jar and seal them with the rims, only tightening the ring as much as you can with your own hand.  Place the jars in a pot of boiling water standing on end. Make sure the water covers the tops of the jars. Boil for 30 minutes, starting the timing when the mixture has returned to a boil after the jars have been added.

6. Remove jars and place in a cool, dry place on a kitchen towel. Allow to cool naturally for a 24 hours. Store jars for the long term in a cool, dry place until using.


Doesn't it look blueberry-licious?  These can be used like canned pie filling.  After opening, bake a covered or uncovered pie, using a 9" pie crust. For uncovered, place dabs of butter on top of the fruit. Optionally, you may mix in 1/2 cup heavy cream to the pie filling after opening and before baking.
Bake at 425° F for 1/2 hour and then reduce temperature to 350° and bake 1/2 hour longer.


You can use this same basic process for many different fruit pie fillings.  These jars make a nice hostess gift, and are great to have on the shelf for a quick dessert.


Zentmrs
Pin It

Wednesday, January 09, 2013

Cranberry Sauce


I love cranberry sauce, any time of the year.  And I love making cranberry sauce.  It's easy and I can make it just to my taste.  The problem is, cranberries are not available all year long.

But I can get around that with a little planning and a little pre-work.  I can buy cranberries when they are available (and better yet on sale) and can them for when they aren't available!


It's the perfect solution - and here's how I do it:


Cranberry Sauce for Canning

Ingredients:

  • 4 cups granulated sugar
  • 4 cups water
  • 8 cups fresh cranberries (about 2 lb)
  • 1 teaspoon vanilla
  • Grated zest of 1 large orange, optional
  • 4 (16 oz) pint or 8 (8 oz) half pint glass preserving jars with lids and bands


Directions:

1.) Prepare boiling water canner. Heat jars and lids in simmering water until ready for use. Do not boil. Set bands aside.

2.) Mix sugar and water in a large stainless steel saucepan. Bring to a boil over high heat, stirring to dissolve sugar. Boil hard for 5 minutes. Add cranberries and return mixture to a boil. Reduce heat and boil gently, stirring occasionally, until all berries burst and liquid begins to sheet from a metal spoon, about 15 minutes. Stir in orange zest, if using, during the last few minutes of cooking.

3.) Ladle hot cranberry sauce into hot jars leaving 1/4 inch headspace. Remove air bubbles and adjust headspace, if necessary, by adding hot cranberry sauce. Wipe rim. Center lid on jar. Apply band until fit is fingertip tight.

4.) Process jars in a boiling water canner for 15 minutes, adjusting for altitude. Remove jars and cool. Check lids for seal after 24 hours. Lid should not flex up and down when center is pressed.


Canning is an easy way to preserve those fruits that one can only get at particular times of the year.  And a great way to have delicious foods available at the drop of a hat... or the turn of a can?

Do you eat cranberries other than at Thanksgiving?


Zentmrs
Pin It

Monday, January 07, 2013

Time to Fill Tuesday's Table - January 7, 2013!


Welcome to Tuesday's Table!

Did you make any New Year's Resolutions?  Generally, I'm not big on New Year's Resolutions - if something needs to be done, why wait until the New Year?

However, this year, I am trying to commit to making more healthy food for my family.  To that end, I'll be trying to stick to more fresh foods, more fruits and veggies and if our food is processed, have it processed by me if possible.  It's a lofty goal - we'll have to see how long it lasts!

Are your resolutions still on track?  Do you have new recipes on your list to try?  Or anything that can help me stick to my resolution?  Share those or any others here at Tuesday's Table!

We've had a lot of fun and creative links shared.  This week I chose three favorites.  (Really, I could have picked all of them, and you should definitely go back and check out all of the great links!)

Half Baked Harvest's Double Chocolate Vanilla Martini.  Yum!


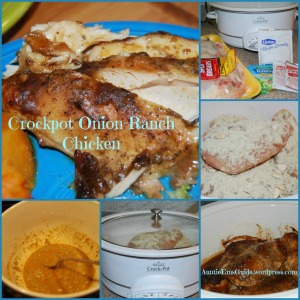
Also loving this:  Auntie Em's Crockpot Onion Ranch Chicken.  I love crock pot recipes and this sounds so delicious.

And isn't this the cutest bread?  Visit Winnie over at Something Sweet to find out how to make it!


Thanks for sharing - grab a button here!


I'll feature my favorite entry from this week on next week's post.  I hope you bring your favorites!

Only a few guidelines:
  • Please share as many links as you like, but only if you haven't shared them here before.  
  • Add a link back to Tuesday's Table (or grab a button above!) so others can join in the fun.  
  • Sign up for my email reminder here.
No other requirements, but visit the other links here, and I'd love for you to follow me too!

And now, for this week's link party!


Zentmrs
Pin It

Asian Turkey Meatballs with Coconut Sauce


I'm a big fan of meatballs, but I've never been very successful at making them uniform and round.  Not sure why, but it's always been frustrating.  Until I found this Sensio Bella Meatball Maker, which makes perfectly round and beautiful meatballs every time!

I used the recipe below, which calls for the meatballs to be baked in the oven, and just used the meatball maker instead.  They turned out beautifully!


Asian Turkey Meatballs with Coconut Sauce

Ingredients:

For the Meatballs:

  • 1/4 cup low-fat coconut milk
  • 2 large egg yolks
  • 1 teaspoon minced garlic
  • 1 teaspoon fresh grated ginger
  • 1 tablespoon soy sauce
  • 2 tablespoons Hoisin sauce
  • 1 small can water chestnuts, chopped
  • 1/2 teaspoon cayenne pepper
  • 2 slices fresh white bread, crusts removed
  • 1/4 cup bread crumbs
  • 1 1/2 pounds ground turkey


For the Sauce:

  • 1 cup coconut milk
  • 1 tablespoon teriyaki sauce
  • 1 teaspoon cayenne pepper
  • 1 teaspoon minced garlic
  • 1 teaspoon onion powder
  • 1 tablespoon brown sugar
  • 1/4 cup orange juice
  • 1 teaspoon cornstarch
  • 1/4 cup cold water
  • steamed rice to serve (optional)

Directions:

Make the meatballs:

Combine all the meatball ingredients except bread in a large bowl and mix well.

Cut bread into 1" squares, and add to large bowl.  Allow bread to soak up liquids.  During the next 10 minutes, stir this mixture 2 to 3 times.

Shape meatball mixture into balls (makes about 8 large meatballs), place on a baking sheet and bake at 375F for 17-22 minutes, or until meatball centers are 170F-180F.


While the meatballs are baking, make the sauce:

Combine all sauce ingredients, except cornstarch and water, in a small saucepan on medium-high heat.  Whisk until sauce begins to boil.  Simmer for 2-3 minutes.  Mix the cornstarch and water.  Add to sauce and whisk until sauce thickens, another 3-5 minutes.

Pour sauce over meatballs and serve with fluffy steamed rice if you like.


These meatballs were a real hit - and easy to make.  Great, bold flavors, but still fairly light and healthy.  This recipe is a keeper!  And the meatball maker made it super-easy.  Not to mention lovely and perfectly shaped meatballs.  I'm sure my Italian ancestors are turning over in their graves, but even they would admit that these look and taste wonderful.  (Eventually.  Grandfather was pretty stubborn.)

Do you make meatballs?  Do you have a better way to make them well-shaped?  What's your favorite meatball recipe?


Zentmrs
Pin It

Sunday, January 06, 2013

Pastitsio (Greek-style Lasagna)

Following along on my Greek-themed recipes, this is a Greek-style Lasagna.  It's a bit like pastitsio, a pasta, lamb and bechamel layered dish, but for this version, I didn't use any meat and used a ricotta cheese mixture instead of bechamel.  Delicious!


Pastitsio 

Ingredients:
  • 2  tablespoons extra-virgin olive oil
  • 1  onion, finely chopped
  • 1  teaspoon dried oregano, crumbled
  • 3/4  teaspoon cinnamon
  • Pinch of ground cloves
  • Salt and freshly ground pepper
  • 3  cups marinara sauce
  • 1  pound ziti or penne
  • 3  cups fresh ricotta (1 1/2 pounds)
  • 4  large egg yolks
  • 1/2  teaspoon ground nutmeg
  • 3/4  cup freshly grated Parmigiano-Reggiano cheese


Directions:

1. Preheat the oven to 350 degrees. Bring a large pot of salted water to a boil. In a large saucepan, heat the olive oil until shimmering. Add the onion, oregano, cinnamon, cloves and a generous pinch each of salt and pepper. Cook over high heat, stirring frequently, until liquid has evaporated, about 8 minutes. Add the marinara sauce and bring to a boil. Boil over high heat, stirring occasionally, until the sauce has reduced slightly, about 5 minutes.

2. Cook the pasta until barely al dente; drain and return to the pot. Meanwhile, in a blender, blend 2 cups of the ricotta with the yolks, nutmeg and 1/2 cup of the Parmigiano-Reggiano until smooth. Season with salt and pepper. Pulse in the remaining ricotta.

3. Add the sauce to the pasta and toss. Transfer the pasta to a 9-by-13-inch baking dish. Pour the ricotta mixture on top and sprinkle with the remaining 1/4 cup of Parmigiano-Reggiano. Bake in the center of the oven for about 20 minutes, until heated through. Turn the broiler on and broil until the top is golden brown. Let stand for a few minutes before serving.


Really a very simple and tasty dish.  If you'd like a meaty dish, add 2 pounds of ground lamb to step one.  That makes a phenomenal sauce and adds a wonderful depth of flavor to your meal.

Would you try this sort of blend of Greek Pastitsio and Italian Lasagna?


Zentmrs
Pin It

Saturday, January 05, 2013

Roasted Potatoes with Lemon Vinaigrette

Remember yesterday's post about the Greek Roast Pork that I said I liked to serve with  some special roasted potatoes?  These are those potatoes.  And you really should try them.  Even if you don't make the pork.  (Though you should try that too - together, it's a crazy-good meal...)


Roasted Potatoes with Lemon Vinaigrette

Ingredients:

  • 3/4 cup extra-virgin olive oil
  • 5 Tablespoons lemon juice, freshly squeezed
  • 2 Tablespoons shallots, chopped
  • 3 Tablespoons fresh oregano, chopped
  • 2 cloves garlic, minced
  • salt and pepper, to taste
  • 3 pounds red potatoes, each potato cut lengthwise into 6 wedges
  • 1/2 cup chicken broth, low sodium

Directions:

1. Preheat oven to 425°F. Whisk olive oil, lemon juice, shallots, oregano, and garlic in medium bowl to blend. Season vinaigrette with salt and pepper.


2. Toss potatoes with 1/2 cup vinaigrette on heavy large rimmed baking sheet or glass baking pan. Reserve remaining vinaigrette for serving. Pour chicken stock around potatoes. Sprinkle potatoes with salt and pepper. Roast potatoes until tender and golden brown, turning occasionally, about 45 minutes. Cool completely. Using metal spatula, loosen potatoes from baking sheet to prevent sticking.

3. Preheat oven to 425°F. Rewarm potatoes until crisp, about 15 minutes. Divide potatoes equally among plates. Drizzle some reserved lemon vinaigrette over potatoes.


Oh my, are these tasty.  Crisp and hot with lovely herb-y lemon flavor.  I could eat these every day.


Zentmrs
Pin It

Friday, January 04, 2013

Roast Pork With Oregano and Honey


Are you looking for an easy but elegant and delicious meal to serve guests?  This is the recipe.  This roast is tender and flavorful, and it makes the most amazing vegetables ever.  I like to serve it with roasted potato with lemon vinaigrette. 


Roast Pork with Oregano and Honey

Ingredients:
  • 1 pork butt, bone-in
  • 1/3 cup olive oil
  • Juice of 1 orange
  • 1/4 cup honey
  • 2 Tbsp. of red wine vinegar
  • 3 Tbsp. of mild mustard
  • 3 Tbsp. of fresh oregano (or 1 Tbsp. dry)
  • 3 cloves of garlic, smashed
  • 1 Tbsp. of coarse sea salt
  • 2 Tbsp. fresh ground pepper
  • 1/4 cup extra-virgin olive oil
  • 3 medium onions, peeled and quartered
  • 1 bag baby carrots
  • 1 green bell pepper, roughly chopped
  • 1 red pepper, roughly chopped
  • 1 pint of cherry tomatoes
  • 1 dried chili pepper
  • 5-6 sprigs of fresh oregano
  • 1 1/2 cups of hot water

Directions:

Preheat your oven to 400F.

Rinse then pat-dry pork and set aside. Using a large container or zip-lock bag, pour in the orange juice, olive oil, vinegar, mustard, oregano, salt, pepper and garlic. Mix well and add pork. Seal and marinate for 2-3 hours before roasting.

Toss the vegetables in a bowl with olive oil, oregano sprigs and chili pepper and reserve in a covered bowl.

Once the pork has marinated, allow the meat to return to room temperature before roasting. Pour the marinating liquid over the meat and season with salt and pepper then place the meat in a roast pan and roast covered for 90 minutes.

Remove the pork from the oven and uncover and place the vegetables around the pork and pour in the hot water and return to the oven for an additional 45 minutes or until the pork has reached an internal temperature of 160F. Remove from the oven and spoon some of the pan juices over the pork and allow to rest for 15 minutes before carving.


This makes a juicy and flavorful roast - and the honey adds to the sweetness of the vegetables.  Taste perfection!  You can't go wrong when you serve this (with those roasted potatoes) to your favorite dinner companions!


Zentmrs
Pin It

Thursday, January 03, 2013

Lemon Coconut Ice Cream


Maybe ice cream isn't the very first thing you think of during these cold days, but this recipe is delicious and simple, and would be wonderful paired with a hot piece of chocolate cake.  Or a piece of galaktoboureko!

Lemon Coconut Ice Cream

Ingredients:
  • 1 can of coconut milk (16 ounces)
  • 1  can of condensed milk (10 ounces)
  • 1/4 cup of honey
  • 1 Tbsp. of vanilla extract
  • 1 tsp. salt
  • zest and juice of 2 lemons
  • 23 ounce ontainer of plain yogurt (at least 3.5 % fat)
  • splash of Limoncello or Malibu coconut liqueur (optional)
Directions:

Ensure the ice cream container from your maker is placed in the freezer and chilled for at least one night prior. In a large bowl, add the coconut milk, condensed milk, honey, vanilla, salt, zest and lemon juice and yogurt. Simply stir with a spatula until combined.  Now you can taste the mix and adjust the flavors as you like.


Cover and place in the fridge for at least 6 hours to overnight. The next day, assemble your ice cream maker and pour the chilled ice cream base into it and churn for 25 minutes. At this point you may add the Limoncello (alcohol helps keep the ice cream smooth).

Empty the contents into a plastic container, cover and place in your freezer for 4 hours or overnight until the ice cream is the correct consistency. Makes about 16-20 scoops.


Zentmrs
Pin It